


Phase 1 : Backup OWA files from Exchange Program files (D:\)
* backup OWA files (custom interface webmail)
* if your exchange environment doesn’t have custom OWA interface, Please Skip Phase 1
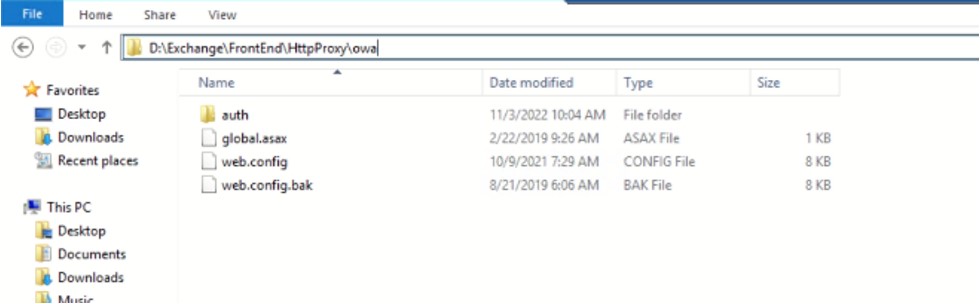
1.Backup whole OWA files from D:\Exchange\FrontEnd\HttpProxy\owa and save to different device
Phase 2 : Enable Maintenance Mode
* Used Exchange Powershell as admin to run command
* Disable Local firewall and Antivirus for temporary
* Check current log in Event Viewer before Start
1. Snapshot/ backup Exchange server
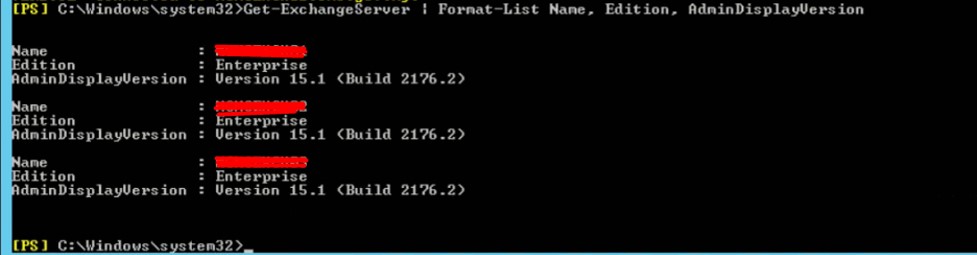
2. Open Exchange powershell and check current version of CU
Get-ExchangeServer | Format-List Name, Edition, AdminDisplayVersion
3. To Set HubTransport to draining state
Set-ServerComponentState -Identity “EXCH01” -Component HubTransport -State Draining -Requester Maintenance
4. To redirect the queued message to server > EXCH01 (DAG)
Redirect-Message -Server EXCH02 -Target “EXCH01” – cannot use
or
Suspend-ClusterNode “EXCH01”

5. To disable database copy auto-activation and move the active copy of the database to another DAG member
Set-MailboxServer “EXCH01” -DatabaseCopyActivationDisabledAndMoveNow $true
6. To block the DatabaseCopyAutoActivationPolicy
Set-MailboxServer “EXCH01” -DatabaseCopyAutoActivationPolicy Blocked
7. To Enable Maintenance Mode
Set-ServerComponentState “EXCH01” -Component ServerWideOffline -State Inactive -Requester Maintenance
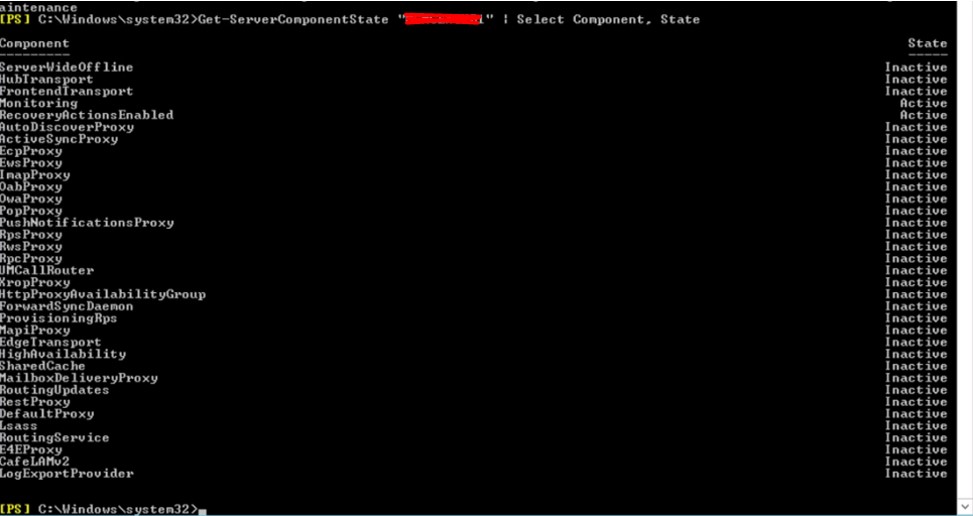
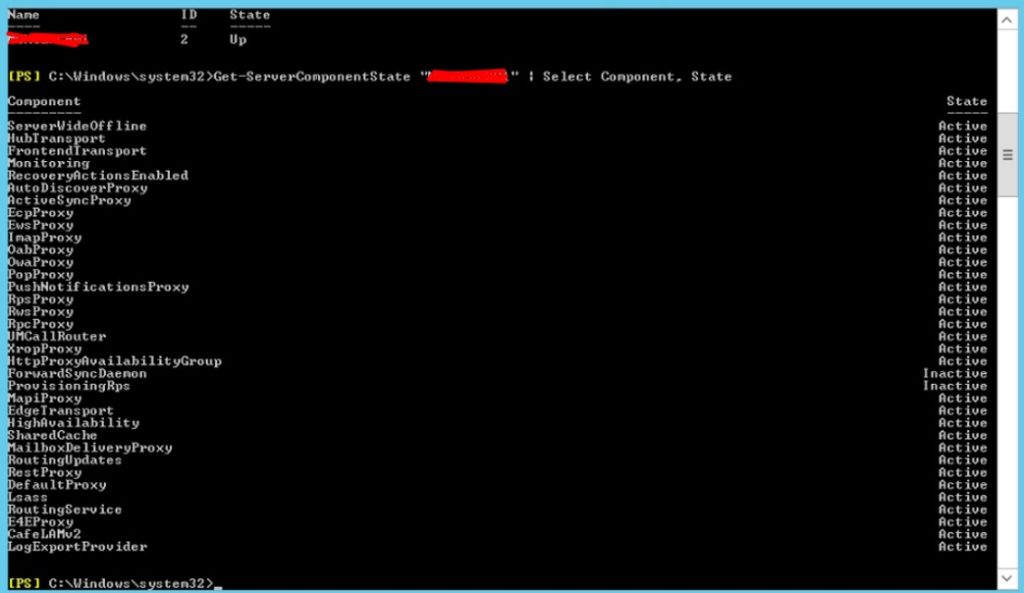
8. To check Maintenance Mode Status :
Get-ServerComponentState “EXCH01” | Select Component, State
Phase 3 : Install Remote Tools Administration Pack
* Login to Current Hosted AD Server
* Open Powershell as admin
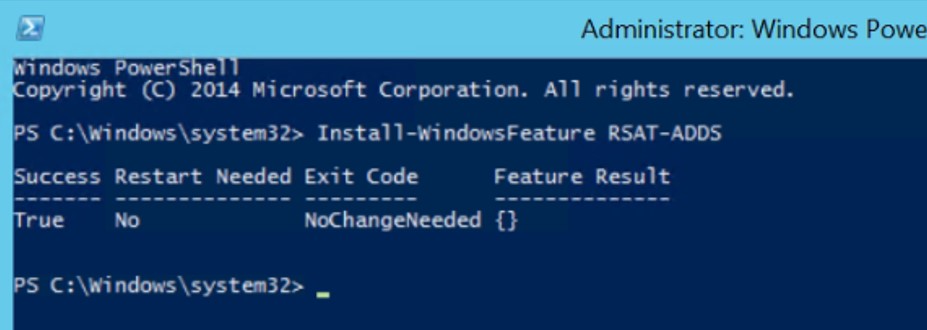
1. Install Remote Tools Administration Pack
Install-WindowsFeature RSAT-ADDS
2. Restart Server
Phase 4 : Prepare Schema, AD, and Domains
* Open Powershell as administrator
1. Mount ISO and identify path. (let say : L:\)
cd L
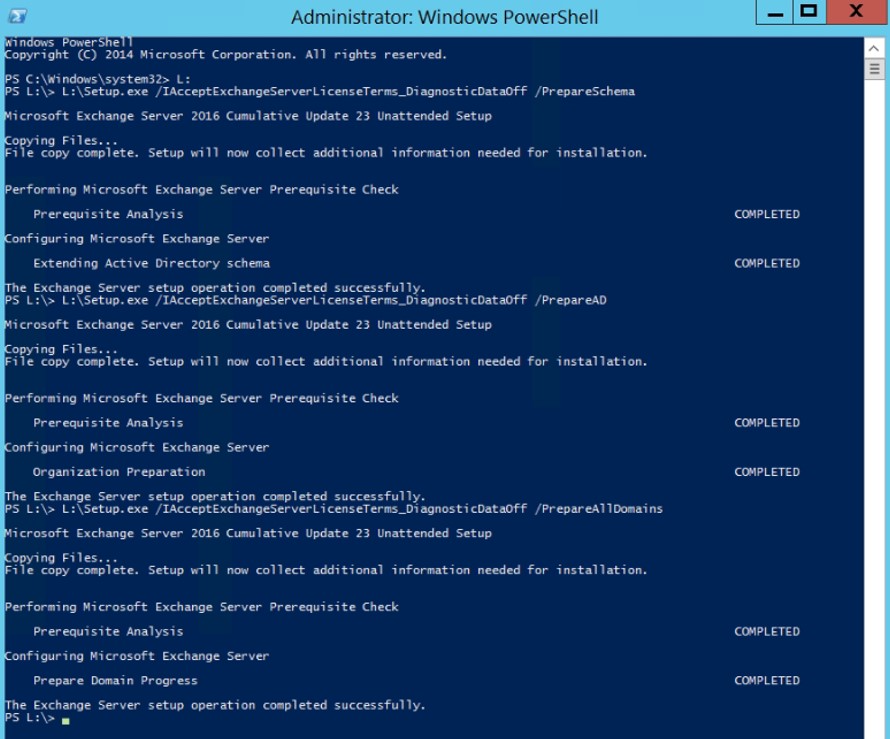
L:\Setup.exe /IAcceptExchangeServerLicenseTerms_DiagnosticDataOff /PrepareSchema
L:\Setup.exe /IAcceptExchangeServerLicenseTerms_DiagnosticDataOff /PrepareAD
L:\Setup.exe /IAcceptExchangeServerLicenseTerms_DiagnosticDataOff /PrepareAllDomains
or
L:\Setup.exe /IAcceptExchangeServerLicenseTerms_DiagnosticDataOff /PrepareDomain
_____________________________________________________________
NOTE: Starting from September 2021 CU, you need to use the
/IAcceptExchangeLicenseterms_DiagnosticDataOFF
or
/IAcceptExchangeLicenseterms_DiagnosticData_ON
for unattended installs.
Restart the server in between to clear any pending reboots.
_____________________________________________________________
Phase 5 : Install Cumulative Updates via Unattended Setup (Unattended Setup)
* Open Powershell as administrator
* Make sure the installation ISO was Mounted
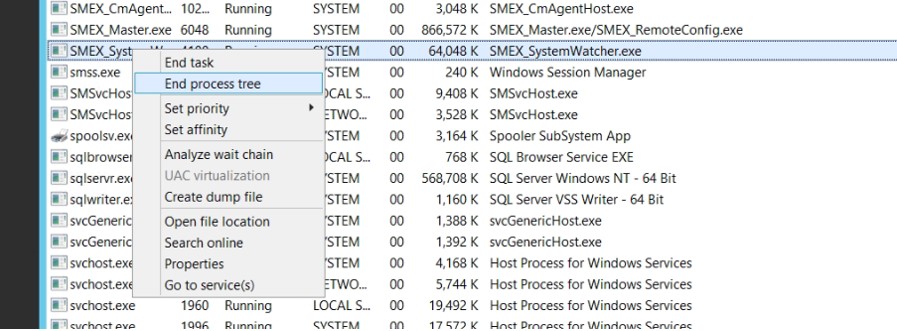
1. Need to End task at task manager :
– SMEX_Master (5236)
– SMEX_SystemWatcher (3828)
2. Install patch Module before run the installation.
– KB2999226
– IIS URL Rewrite Module 2
3. Start run the installation via command prompt
L:\Setup.exe /IAcceptExchangeServerLicenseTerms_DiagnosticDataOFF /Mode:Upgrade
4. Let the installation complete. (it will takes several hour )

Phase 6 : Exit Maintenance Mode :
* Used Exchange Powershell as admin to run command
Set-ServerComponentState “EXCH01” –Component ServerWideOffline –State Active –Requester Maintenance
Set-ServerComponentState EXCH01 –Component HubTransport –State Active –Requester Maintenance
Resume-ClusterNode –Name EXCH01

Set-MailboxServer EXCH01 –DatabaseCopyAutoActivationPolicy Unrestricted
Set-MailboxServer EXCH01 –DatabaseCopyActivationDisabledAndMoveNow $false
Set-ServerComponentState “EXCH01” –Component ServerWideOffline –State Active –Requester Maintenance
Set-ServerComponentState EXCH01 –Component HubTransport –State Active –Requester Maintenance
Get-ClusterNode “EXCH01”
Get-ServerComponentState “EXCH01” | Select Component, State
Phase 7 : Restore OWA files into Exchange files
* Skip this Phase if not performed on phase 1
- Enter files D:\Exchange\FrontEnd\HttpProxy\owa
- Copy file name (from backup files) as below and Replace into current folder
- Global.asax
- Web.config
- Web.config.bak

- Enter files D:\Exchange\FrontEnd\HttpProxy\owa\auth
- Copy file name (from backup files) as below and Replace into current folder
- Copy all files inside 15.1.2176 and replaceinto 15.1.2507
- Copy all files inside “Current” and replace into “Current”
- Copy all aspx, aspx_old and htm files and replace into same current location
- Complete. And clear browser history and access webmail link
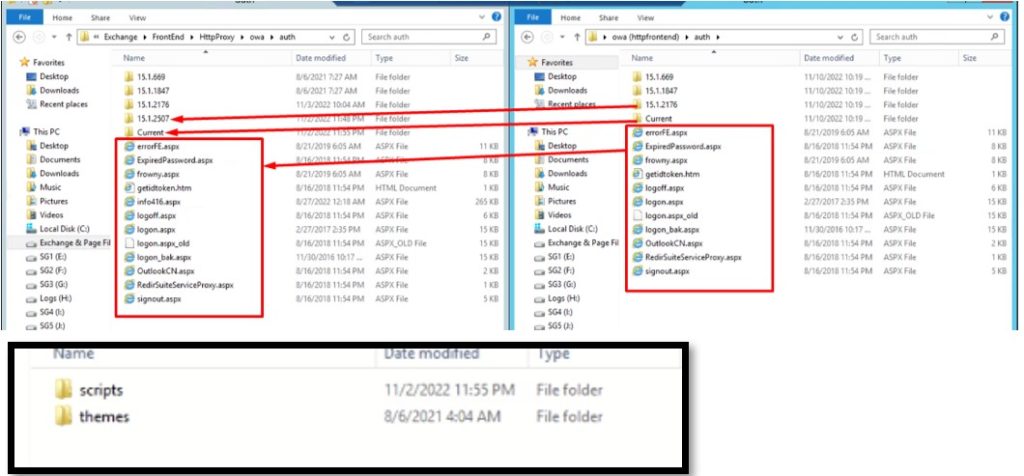
Figure 1The files inside 15.1.2176 and Current folders
Final : Upgrade Completed
- Check Event viewer Logs . try to resolve if have any error log
- Repeat Same step to EXCH02 and EXCH03 (need replace Server name)

![]()